


Table Of Contents
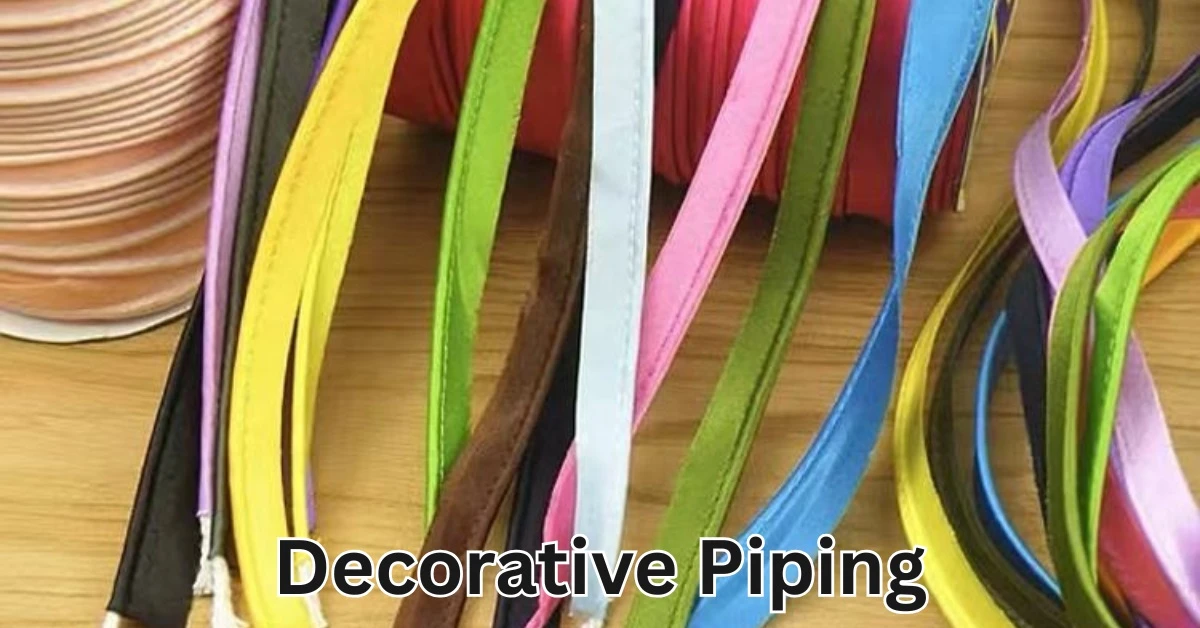
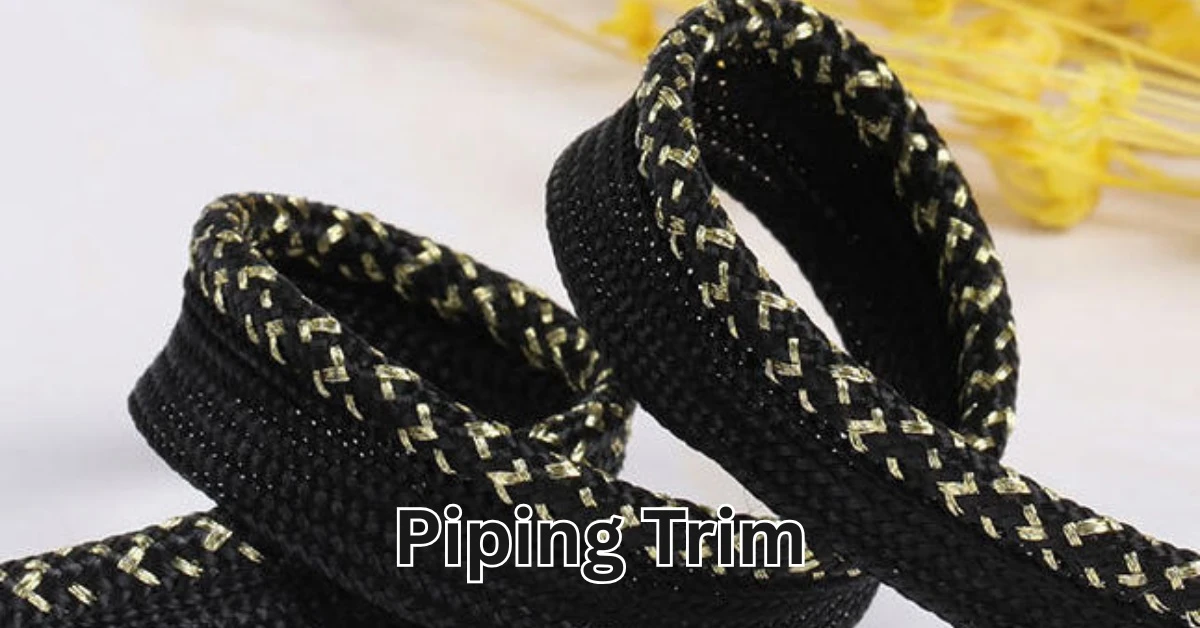
What Is Piping?
Piping is a narrow trim made with a fabric strip folded around a cord and stitched into garment seams for a clean, raised outline. You see it on collars, pockets, waist seams, cushions, and even high-end jackets. It adds structure and a crisp visual border. In most garments, the piping diameter stays between 1.5 mm and 5 mm, depending on how bold the designer wants the edge. Think of piping as the “underline” of a garment—subtle, but it guides the eye and gives the seam more personality. It also increases seam strength by a small percentage, usually 5–12%, because the cord stabilizes the edge. In short, piping makes a simple seam look refined without much cost or effort.
Why Add Decorative Piping?
Piping gives garments a crisp edge. It adds contrast. It adds structure. It also hides raw edges. Designers use piping for 3 main reasons:


- Visual outline. Piping can raise perceived value by 10–40% in retail presentation.
- Edge control. Piping stops stretched seams on light fabrics.
- Detail work. It makes pockets, collars, and sleeves look tailored.
Use piping on 5 common spots: neckline, pocket, sleeve hem, seam lines, and waist. Use piping if you want a small design lift with low material cost.
Tools and Materials You Need
Piping cord and tape types
- Pre-made piping: Cord already inside the fabric tape. Fast. Use for small runs.
- DIY bias piping: Cut bias strips, fold around the cord, and stitch. Flexible for curves.
Pick cord size: 1.5 mm for fine garments; 3–5 mm for home goods.
Machine feet and needles
- A piping or zipper foot gives a close stitch next to the cord.
- Use a new universal 70/10 needle for light fabric. Use 90/14 for heavy fabric and big cord.
Fabric choices and thread choices
- Use a thread that matches the tape. Polyester thread gives a slight give. Cotton thread gives a matte finish.
- For slippery fabric, add a 10–20% wider seam allowance to control slippage.
Step-by-Step: How to Prepare Piping
Cut bias tape vs straight tape
- For curves, cut bias strips. Bias allows stretch.
- For straight edges, cut on the grain. Grain gives stability.
- Strip width rule: tape width = cord diameter + (seam allowance × 2) + 2–3 mm for fold.
Insert the Cord and Press
- Fold the tape around the cord. Align raw edges.
- Use a long basting stitch (4–5 mm) to hold the cord if you work by hand.
- Press flat with a warm iron. Do not press the cord directly if it melts. Place a cloth in between.
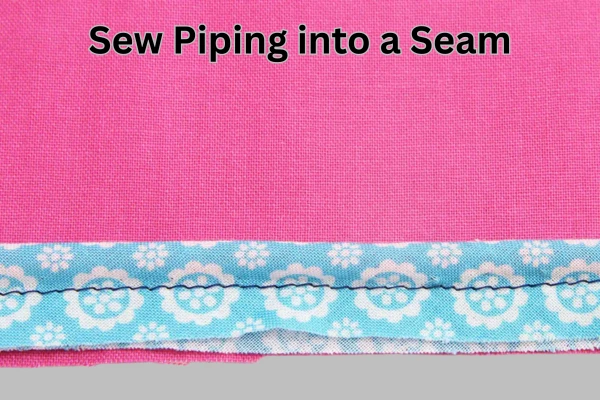
Step-by-Step: How to Sew Piping into a Seam
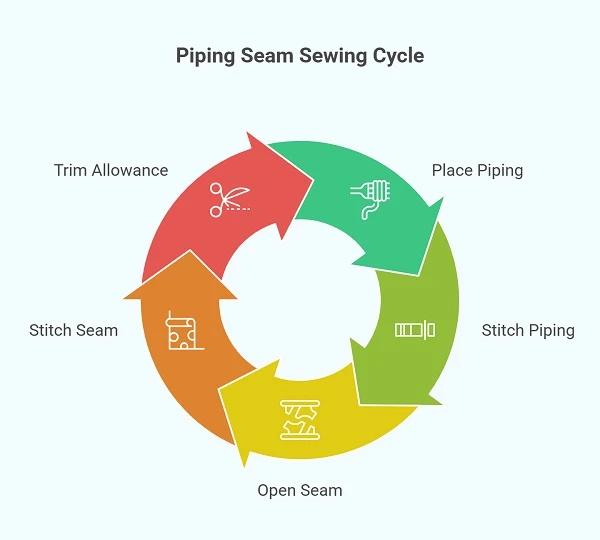
Baseline method for straight seams
- Place piping on the right side of the garment with the cord facing the seam line.
- Align the raw edges of the piping tape and the fabric edge.
- Use a zipper/piping foot. Stitch close to the cord. Stitch 2–3 mm from the cord for a neat look.
- Open seam. Place the other fabric piece right sides together over the piping and stitch the seam allowance with a 1.0–1.5 cm allowance.
- Trim allowance to 5–7 mm if the fabric is bulky.
Method for curved seams
- Pin piping at 1–2 cm intervals. For tight curves, place pins on the tape, not on the cord.
- Ease the fabric gently. Do not pull hard.
- Stitch slowly. Reduce feed dog pressure if your machine lets you.
- Clip seam allowance every 5–8 mm on inward curves to allow a smooth turn.
Method for corners and boxed seams
- Stop stitching 3–4 mm before the corner.
- Lift the needle, pivot, and fold the cord out of the way to create a small miter.
- Continue stitching from the corner. Trim excess fabric. Hand-tuck raw ends of tape if needed.
Finishing, Topstitch, and Clean Up
Trim seam allowance and clip curves
- Trim to 4–6 mm when the fabric is heavy.
- Clip curves frequently on inward curves to avoid puckers.
Topstitch and press
- Topstitch 2–3 mm from the piping edge for a tailored look.
- Press lightly. Press from the wrong side if the fabric's shine appears.
Common Problems and Quick Fixes
Lumpy or uneven piping
- Cause: cord roll or uneven feed. Fix: re-baste piping with long stitches. Use a steady speed.
- Cause: tape too wide. Fix: reduce tape width by 1–2 mm.
Cord visible or tape puckered.
- Cause: stitch too close to the cord on bulky fabric. Fix: move stitch 1 mm away.
- Cause: fabric pull. Fix: clip allowance and press gently.
Pro Tips and Production Notes
Speed vs quality (time estimates)
- Hand-made piping for one garment: 15–35 minutes extra.
- Machine-insert piping: 6–12 minutes per seam on average.
- In small production, piping adds 5–12% to labor cost. In custom work, value uplift can exceed 30%.
Cost and material numbers
- Pre-made piping tape: roughly $0.10–0.50 per meter, depending on fabric.
- DIY bias tape: cost equals base fabric scrap + cord ($0.05–0.20 per meter).
- Use pre-made piping for efficiency when the run length exceeds 50 m.
Conclusion
Piping gives garments a small flourish with a big visual return. The method needs careful prep, the right foot, and steady stitch control. Use bias tape on curves. Use pre-made tape for straight edges and large runs. Follow the steps above, and you will add sharp lines to pockets, collars, and seams. Try one simple pocket first. You will get faster with practice. Mistakes happen. That is how skill grows.
FAQs
1: Which foot works best to sew piping?
Use a piping or zipper foot. That foot keeps the needle close to the cord. It gives the neatest stitch.
2: Can I add piping to a finished garment?
Yes. Use hand-baste to place piping. Open the seam if possible. Insert piping and restitch carefully.
3: What cord size suits a blouse?
Use 1.5–2.5 mm cord. It looks refined and does not bulk the seam.
4: How to handle very tight curves?
Cut bias tape. Clip the seam allowance often. Use short stitches while you sew slowly.
5: How to wash garments with piping?
Check fabric care. Use cool water for delicate piping fabrics. Tumble dry low for sturdy tape; otherwise, air dry to keep shape.
Comments - 00
Leave A Reply
Thanks for choosing to leave a comment.